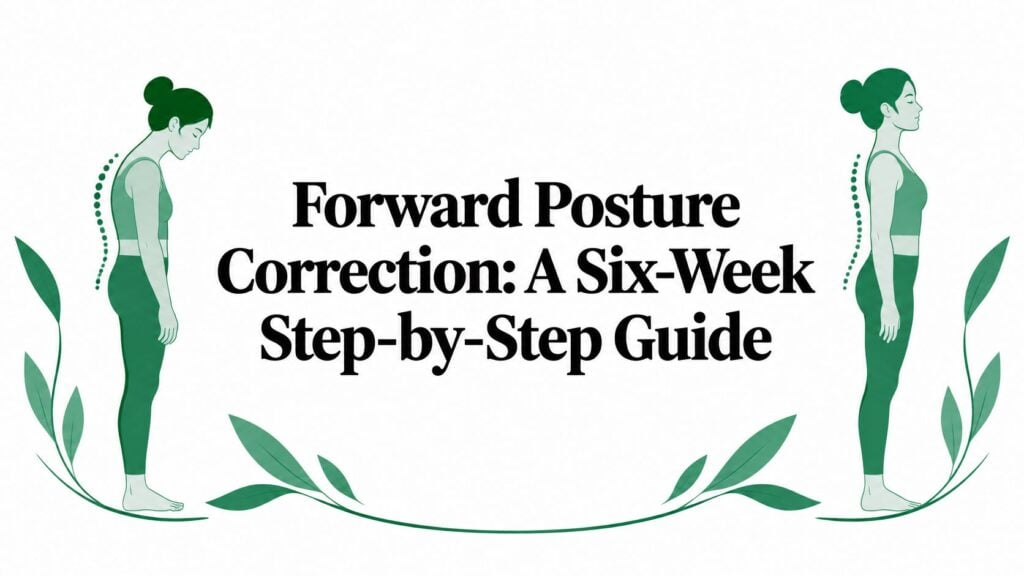
Approximately 66% of the population has forward head posture, according to a 2025 systematic review published in Cureus. That estimate makes the position sound common, not automatically harmful. A head that sits forward of the shoulders isn't, by itself, a diagnosis or proof that something needs fixing.
Forward posture correction works best as a gradual program that builds neck and upper-back control, improves comfortable movement, and changes demanding daily habits. A useful plan considers the shoulders, breathing, jaw function, and symptoms together, rather than chasing a perfect side-view photograph.
Table of Contents
- Your Six-Week Forward Posture Correction Plan
- How to Check Your Posture Before You Start
- How Breathing and Tongue Position Fit In
- Stretches and Strengthening Exercises to Follow
- Daily Habits and Desk Setup That Support Progress
- When to Seek Multidisciplinary Evaluation
- Schedule Your Posture and Airway Evaluation
Your Six-Week Forward Posture Correction Plan
A six-week framework gives adults a practical way to organize exercise and reassessment. It's a starting structure, not a deadline for recovery. Someone with ongoing pain, a recent injury, or a diagnosed neck condition may need a different approach.
Forward head posture means the head rests in front of the shoulders. Holding that position for long periods can increase the work required from the neck and upper back. However, a temporary position during reading is different from a fixed spinal change, and neither can be fully assessed from appearance alone.
Consider an adult who develops neck tension during computer work. A useful target might be finishing work more comfortably, turning the head with less restriction, and keeping the jaw relaxed. A straighter photograph may be welcome, but it shouldn't be the only measure of progress.
Six-week forward posture correction program at a glance
| Phase | Timing | Focus | Frequency |
|---|---|---|---|
| Baseline check | Week 0 | Side-view photo and craniovertebral angle | Once before starting |
| Build control | Weeks 1-2 | Deep neck flexor and shoulder blade control | 3 sessions per week |
| Build strength | Weeks 3-4 | Add thoracic mobility and chest stretching | 3 sessions per week |
| Integrate habits | Weeks 5-6 | Add desk setup changes and daily movement breaks | 3 sessions plus daily habits |
| Reassess | Week 6 | Repeat angle check, pain score and neck disability score | Once at week 6 |
The baseline establishes a comparison. Early control work teaches comfortable movement without straining, while the strength phase adds capacity around the neck and shoulders. Habit integration brings those skills into ordinary tasks, and reassessment checks whether the program is helping.
The first action is simple: take a relaxed side-view photograph and record current neck, shoulder, headache, and jaw symptoms. Persistent headaches or jaw pain deserve evaluation rather than an assumption that posture is the cause.
How to Check Your Posture Before You Start
A mirror encourages people to straighten up before looking. Camera height, head rotation, and an intentional chin tuck can also change the result. A useful baseline captures a normal relaxed stance, not the best position someone can briefly hold.
A clinical trial published in Asian Spine Journal used the craniovertebral angle to assess forward head posture and studied a program delivered three times weekly for six weeks. Its participants had angles of 50 degrees or less, but that study cutoff isn't a universal boundary between healthy and unhealthy posture.
Taking a consistent side-view photograph
Stand naturally beside a wall edge or plumb line that provides a vertical reference. Position the camera level with the upper body, directly to the side, and look ahead without deliberately pulling the shoulders back. Use the same camera position, stance, and viewing direction for later comparisons.
Locate the tragus, the small cartilage flap in front of the ear opening. Then identify C7, a vertebra near the base of the neck that often forms a noticeable bony bump. A clinician can help confirm the landmark because a nearby vertebra may be mistaken for it.
The craniovertebral angle, or CVA, is measured between a horizontal line through C7 and a line connecting C7 to the tragus. Smaller angles indicate greater forward head displacement. A photo-measurement tool can draw these lines, but inconsistent landmarks can make small changes misleading.
Posture check cues and what they may suggest
| Check | How to assess | What it may indicate |
|---|---|---|
| Ear position | Side view; does the ear sit in front of the shoulder line? | Forward head posture |
| Craniovertebral angle | Measure the angle from C7 to the tragus on a side photo | Smaller angles suggest greater forward head displacement; track against baseline |
| Shoulder position | Check whether shoulders roll forward of the body line | Rounded shoulders |
| Upper-back curve | Notice whether the mid-back curve looks more pronounced than usual | Increased thoracic curve |
| Jaw and neck symptoms | Record headaches, jaw clicking, or neck pain after prolonged sitting | Possible contributors that need clinical evaluation |
| Breathing at rest | Watch whether the chest and shoulders lift with each breath | A possible breathing-pattern contributor |
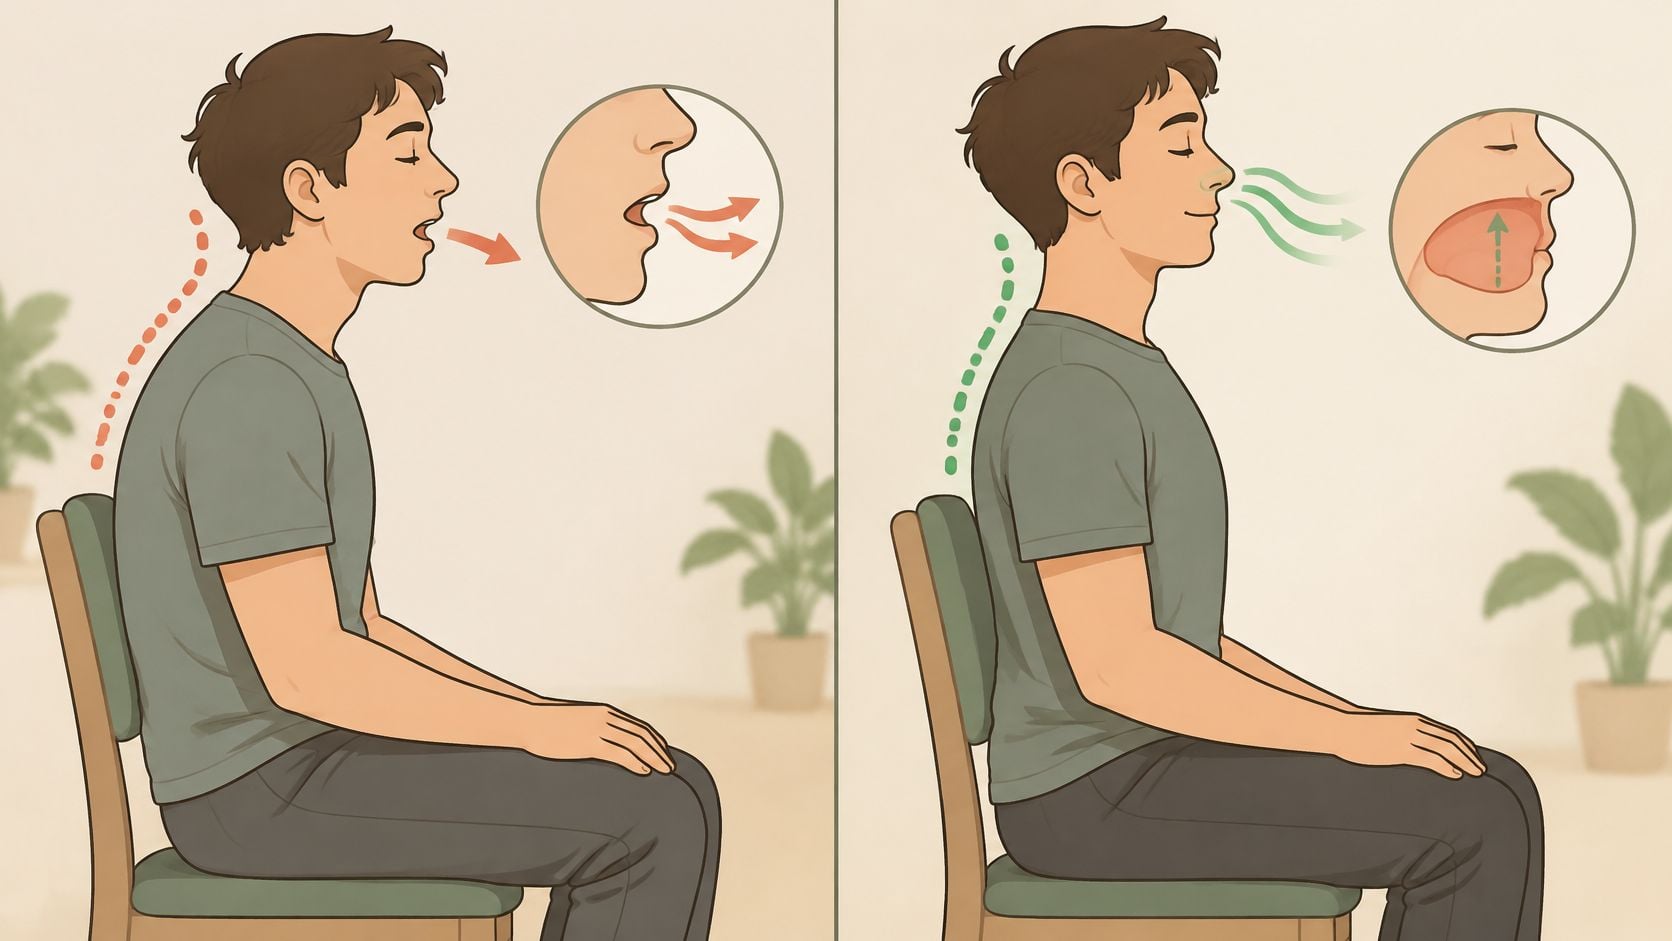
The diagram illustrates positions, not a diagnostic test. Neither a photograph nor an angle can establish that posture causes pain, explain mouth breathing, or identify an airway problem.
Persistent headaches, jaw clicking, or arm numbness warrant an evaluation. A clinician can add movement testing, strength assessment, and a neurological examination when appropriate.
How Breathing and Tongue Position Fit In
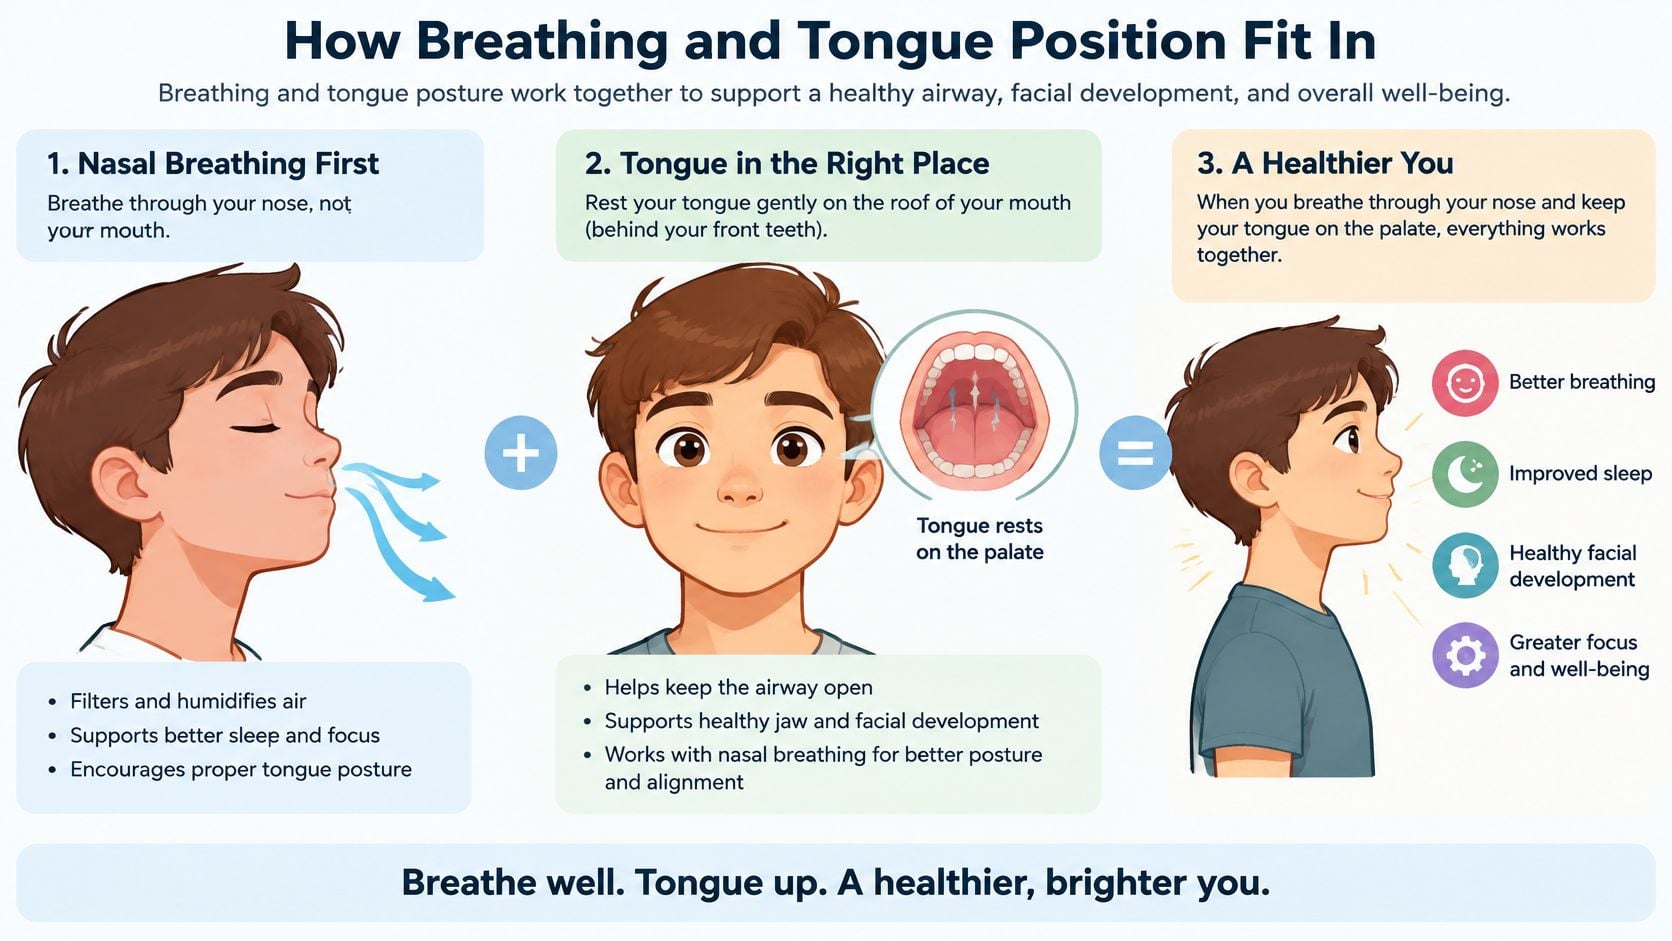
Breathing and neck position work like neighbors sharing a wall: what happens on one side affects the other. Forward head posture often travels with mouth breathing, so this plan treats them as one capacity to build gradually, alongside the neck and shoulder work you are already doing.
A comfortable resting position
Start with the resting position itself. Let the lips close gently, keep the teeth slightly apart, and rest the tongue against the roof of the mouth just behind the front teeth. The tongue should rest there without pressing hard against the teeth, and the jaw should stay unclenched.
Then check your nasal breathing. Close your mouth and breathe through your nose for about a minute. If that feels easy, the position is working for you. If it feels strained, that points to something worth assessing rather than something to push through. The guide to reducing mouth breathing explains related habits and considerations.
What a tongue restriction may mean
In adults, tongue ties can contribute to sleep-disordered breathing, snoring, sleep apnea, and head, neck, and shoulder pain. A restricted tongue is one possible factor to assess, since its role cannot be confirmed by symptoms or a photograph alone.
Myofunctional therapists, clinicians who address oral muscle habits and function, train awareness of proper tongue placement, nasal breathing, and correct chewing and swallowing patterns. This kind of training builds capacity the same graded way your exercise plan does: small positions practiced consistently, then held more comfortably over time.
Comfortable breathing matters more than holding a prescribed tongue or head position.
Sleep apnea requires a sleep study and physician diagnosis. Snoring, gasping, or unrefreshing sleep call for an evaluation rather than posture drills alone.
Two gentle habits fit daily life: comfortable nasal breathing during ordinary tasks, and a brief breathing practice lasting one to two minutes daily. Keep the breaths quiet and easy. Stop if you feel air hunger, strain, or the urge to hold your breath.
Stretches and Strengthening Exercises to Follow
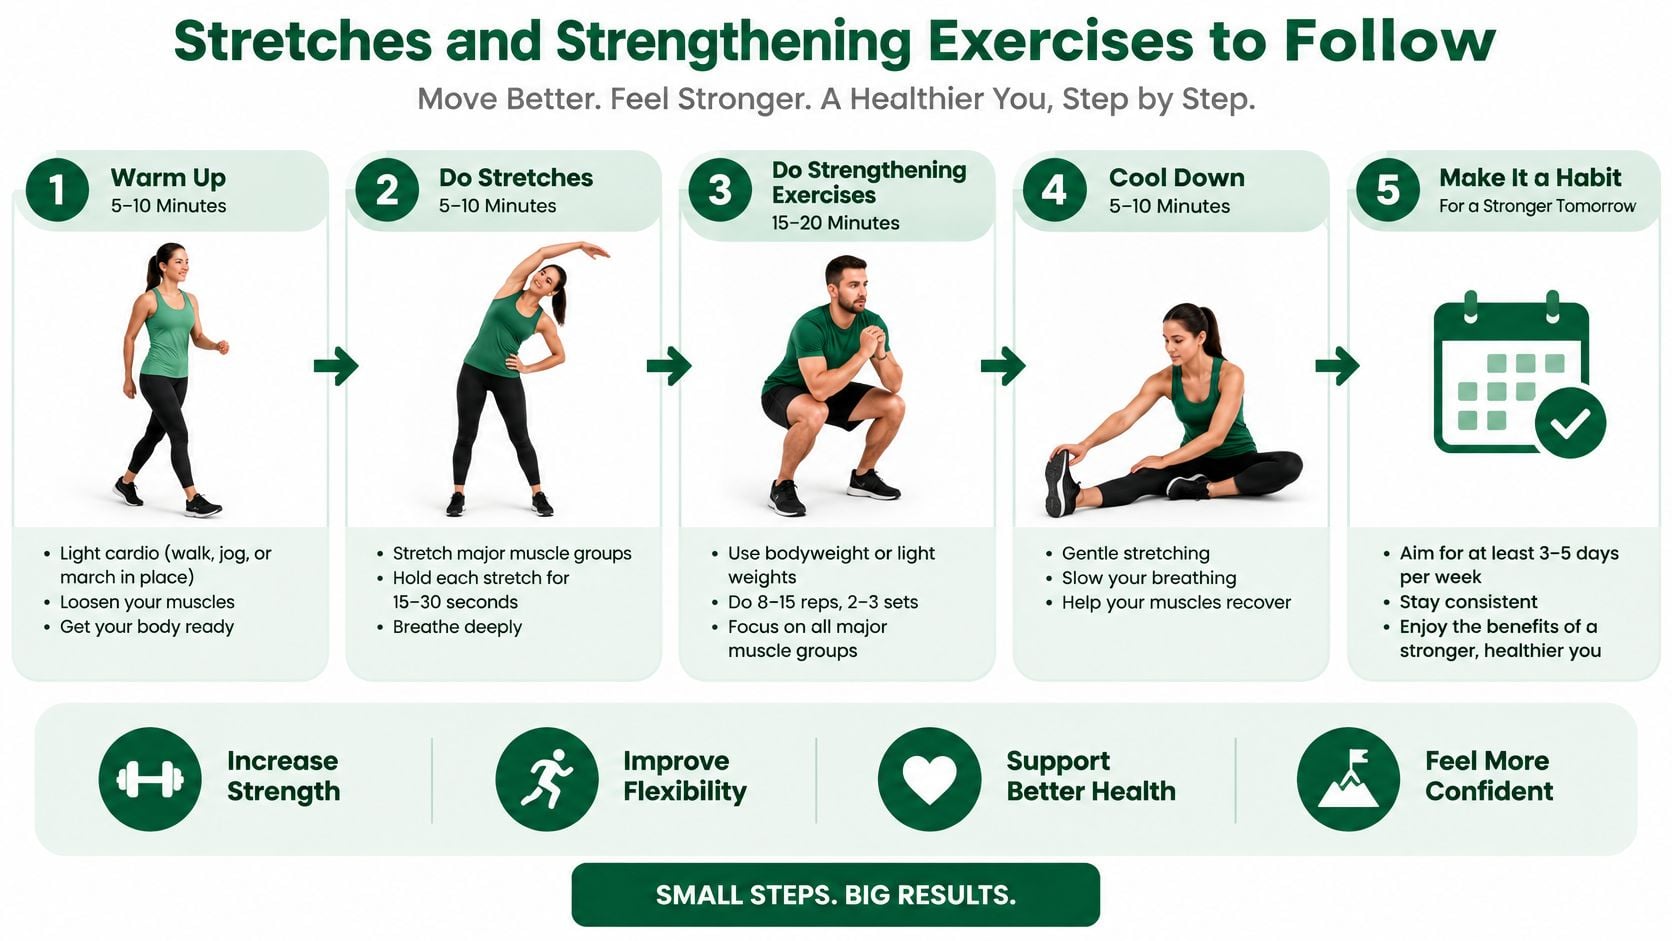
A starting schedule is three sessions per week, combining stabilization, stretching, and mobility. The doses below are practical starting examples, not a universally validated prescription. A physical therapist can adjust them for symptoms, movement limits, or previous injury.
A systematic review and meta-analysis of therapeutic exercise reported approximately 3.38 degrees of CVA improvement compared with controls and about 1.42 points of pain reduction, while noting substantial differences among studies. Those averages don't predict an individual result, and better alignment doesn't necessarily mean symptoms have resolved.
A gentle starting routine
Warm up with relaxed breathing and movement. Spend two minutes allowing the lower ribs and abdomen to move gently with breathing, followed by comfortable neck turns. This prepares movement without bracing; a common slip is taking oversized breaths or lifting the shoulders.
Practice small chin nods while lying down. Complete 10 slow repetitions with a five-second hold, using a thin head support if needed. This trains the deep neck flexors, small muscles that help control the neck; avoid lifting the head, jutting the chin forward, or forcing a hard tuck.
Try 10 wall angels. Stand near a wall and slide the arms upward only as far as comfortable to practice upper-back and shoulder-blade control. The hands don't have to touch the wall, and arching the lower back to gain height misses the purpose.
Add shoulder-blade retractions. Perform 10 repetitions with five-second holds, gently drawing the shoulder blades toward each other without forcing them downward. This practices controlled shoulder support; squeezing hard enough to tense the neck is a common mistake.
Use a doorway chest stretch. Rest the forearms on the doorway and step forward slightly for two 30-second rounds. The stretch should feel mild across the chest, not sharp at the front of the shoulder; lowering the arms may make it more comfortable.
Stretch the upper trapezius gently. Tilt an ear toward the shoulder for two holds of 20 to 30 seconds per side, keeping the opposite shoulder relaxed. This addresses the muscle along the upper shoulder; pulling firmly on the head adds unnecessary force.
Finish with supported upper-back extension. Spend two minutes making small, comfortable movements over a towel roll placed across the upper back, with the head supported. This encourages thoracic mobility, meaning movement through the mid-back; avoid tipping the neck backward or placing the roll under the neck.
Progress by comfort, not effort alone
Keep holds unchanged during the first two weeks. When the routine feels easy and doesn't increase symptoms, a cautious progression is adding five seconds to a hold or adding a set, rather than increasing everything together.
For readers recovering from a neck injury, Seasons Chiropractic's resource on keeping active through whiplash recovery provides context for discussing activity with a treating clinician. Injury rehabilitation still needs individual guidance.
Separate exercises intended to reduce snoring address a different goal and shouldn't replace assessment for suspected sleep apnea.
At week six, repeat the photograph and CVA measurement, record pain on a zero-to-ten scale, and complete the Neck Disability Index, a questionnaire about how neck pain limits daily tasks. Compare these with baseline alongside sleep, comfortable movement, and activity tolerance.
Stop movements that reproduce headache, dizziness, radiating pain, or jaw symptoms. Aggressive chin-tucking and forceful neck extension aren't required for progress.
Daily Habits and Desk Setup That Support Progress
| Element | Target setting | Why it helps |
|---|---|---|
| Monitor top | At or slightly below eye level | Reduces sustained head tilt |
| Monitor distance | About an arm's length away | Limits forward reach of the head |
| Chair back | Supports the lower back and gently the upper back | Reduces slumping |
| Elbows | Bent near 90 degrees, close to the body | Keeps shoulders relaxed |
| Feet | Flat on the floor or a footrest | Supports upright sitting |
| Phone | Held near eye level when reading | Reduces looking down |
These desk and device setup targets are starting points, not rigid rules. Glasses, screen size, and the task itself may require adjustment. Text should be large enough to read without leaning toward the display.
For chair-adjustment ideas, Tip Top Furniture & Mattresses' guide to home office seating for Upstate homeowners offers a practical reference. The useful test is whether the chair supports comfortable work and allows position changes, not whether it enforces one pose.
Make movement part of the task
During long screen sessions, a practical reminder is a brief movement break every 30 to 60 minutes. Standing, walking, reaching comfortably, or changing tasks can interrupt sustained loading. There's no need to perform a full exercise routine at every break.
- Raise reading material. A book stand or supported device reduces the need to keep looking into the lap.
- Balance carried loads. Distribute bags evenly when practical rather than repeatedly loading the same shoulder.
- Support comfortable sleep. A pillow that keeps the neck reasonably aligned with the spine suits many people; the best choice depends on sleep position and comfort.
- Notice tension habits. Poor sleep and stress can increase muscle guarding, so persistent clenching or difficulty relaxing deserves attention.
A practical trial is sitting in the adjusted setup for 20 minutes while noting comfort and task tolerance. Only brief, mild discomfort may suggest the setup is workable, but it isn't proof that everything is correct. Growing discomfort calls for another adjustment or reassessment.
Maintenance without rigid bracing
A 2025 systematic review of orthotic devices included 10 studies and 450 patients and reported improvements in postural measures. It didn't establish whether devices deliver lasting functional benefits or relieve pain better than exercise.
A brace may provide an external reminder or short-term alignment change. It doesn't, by itself, build endurance, body-position awareness, or tolerance for working and reading.
Practical rule: support should make daily activity easier, not create dependence on holding the body rigidly.
After the initial program, a shorter maintenance routine might retain chin nods, wall angels, and movement breaks a few times weekly. Returning symptoms call for reassessment rather than tightening a brace or doing harder exercises. This plan doesn't require a brace.
When to Seek Multidisciplinary Evaluation
Posture work builds capacity across the neck, shoulders, breathing, and jaw, so when progress stalls the useful question is which part of that chain needs a clinician. Matching the concern to the right specialist first saves time and avoids dead ends.
A primary care physician can assess general health and medical causes of symptoms. A physical therapist evaluates movement, strength, and activity tolerance. A dentist or craniofacial pain specialist can assess jaw, head, and facial pain, while a sleep physician evaluates suspected sleep-disordered breathing.
Symptoms that interrupt self-care
New neurological symptoms or sudden severe pain need medical attention, and the urgency depends on the pattern. Certain changes should pause the exercise routine entirely:
- New arm or hand numbness or weakness: seek prompt assessment, especially if symptoms are progressing.
- Loss of balance: unexplained changes in walking or coordination warrant medical review.
- Sudden severe headache: seek emergency care, particularly with weakness, confusion, or vision changes.
- Neck pain after an injury: obtain appropriate assessment before stretching or loading the neck.
- Worsening pain: pain that steadily increases rather than settles needs reassessment.
Symptoms that deserve a scheduled visit
Jaw symptoms deserve careful reading during a posture program because the jaw adapts slowly. Clicking becomes a reason for assessment when it arrives with pain or limits how far the jaw opens, and jaw locking belongs on the same list. Headaches or jaw pain that persist through consistent care justify an appointment, as does neck or shoulder pain continuing beyond about six weeks.
Loud snoring, gasping, witnessed breathing pauses, morning headaches, and daytime sleepiness warrant discussion with a medical professional. These symptoms can have different causes, so a response to exercise can neither confirm nor exclude a sleep disorder.
Adults concerned about restricted tongue movement can review adult tongue-tie symptoms before an evaluation. An assessment determines whether a restriction is contributing to symptoms and whether any treatment is indicated.
What a sleep assessment involves
A sleep assessment may involve polysomnography, or PSG, an overnight study that records sleep and breathing signals, or an appropriate home sleep study. A boarded sleep physician reads and interprets the raw data from both PSG and home testing. Screening questionnaires and wearable readings sit outside that diagnostic process.
When physical airway barriers prevent CPAP and oral appliances from helping, Pain and Sleep Therapy Center works with the appropriate physician to create a plan for the best possible outcome. That coordination keeps treatment matched to each patient's findings.
Continue comfortable self-care while symptoms improve. Seek evaluation when symptoms persist, worsen, or interfere with daily life.
An improving photograph loses meaning when pain worsens, sleep suffers, or function declines. Those changes carry more weight than any measured angle.
Schedule Your Posture and Airway Evaluation
An evaluation works best as a continuation of your six-week plan rather than a verdict on it. You arrive with measurements and a symptom record, and a clinician tests whether jaw mechanics, airway function, or muscle patterns are limiting what exercise and habit change can do on their own.
A side-view photo can show where your ear sits relative to your shoulder. It cannot show how your jaw joints load, whether your tongue rests against the palate, or whether your airway narrows during sleep. Those questions need a hands-on assessment.
Pain and Sleep Therapy Center evaluates TMJ disorders, head and facial pain, sleep-disordered breathing, and tongue-tie concerns under one roof. The team is led by Dr. Ryan Robinson, triple board-certified in craniofacial pain and dental sleep medicine, and the evaluation emphasizes identifying contributing causes before invasive options enter the conversation. TMJ treatment plans may include orthotic therapy, cold laser therapy, lifestyle modifications, and collaborative care with other healthcare professionals. Which of those applies depends on your findings and history, not on how a photograph looks.
Useful information to bring
- Baseline records: relaxed side-view photographs and any CVA measurement notes, including how the photographs were taken.
- A symptom log: headache patterns, jaw and neck pain, activity triggers, sleep quality, and changes during exercise.
- Treatment history: current medications, previous therapies, relevant diagnoses, and available sleep-study results.
- Personal goals: specific activities that have become difficult, such as reading comfortably, completing computer work, or waking feeling rested.
The center serves patients in Newark, Delaware, and Bryn Mawr, Pennsylvania, including the Philadelphia Main Line. An appointment can help determine whether movement care, jaw assessment, airway evaluation, or coordinated medical care fits your situation.
A forward posture correction plan holds together when exercise, habit changes, and evaluation each do their part. Professional guidance matches the pace and priorities to your history, so capacity keeps building in the right order.
Pain and Sleep Therapy Center offers coordinated evaluation of jaw, head and facial pain, sleep concerns, and tongue function that may overlap with neck symptoms. Visit Pain and Sleep Therapy Center to Request an Appointment or Take our Sleep Quiz.